
A few people asked how I created the circles so here we go. I actually first used this method when I was making little woolly underpants for Seamus the monkey and I wanted a nice finish on the tail hole.
I also used the same method to create windows in the Animal house pattern.
I'm sure there are a zillion similar methods out there by real quilters and certainly properly piecing circles is not in my repertoire but I love the little window-look I get this way.
The patterned fabric is the top fabric, the white is the "lining" of the circle and the bright blue is the piece we want peeking through. (Normally the "lining" would be the same as the top fabric but its easier to show here with different fabrics.) Draw the EXACT size circle that you want on the back of your lining piece and place it face down in position on your top fabric.
 Sew completely around the circle directly on the line. Trim your lining fabric
 Cut the centre out of the circle leaving about 1/4 inch seam allowance inside your sewing line. Clip the circle.
 Now tuck the lining piece in through the circle and smooth it out behind.
 Hey presto ! Give it a press with the iron.
 This is what we have at the back
 and in between the layers.... You can further trim that lining piece on the back if you like.

Put your third piece of fabric behind the window you have created (This would be good for fussy placement of little pictures)
Draw the EXACT size circle that you want on the back of your lining piece and place it face down in position on your top fabric. Sew completely around the circle directly on the line. Trim your lining fabric
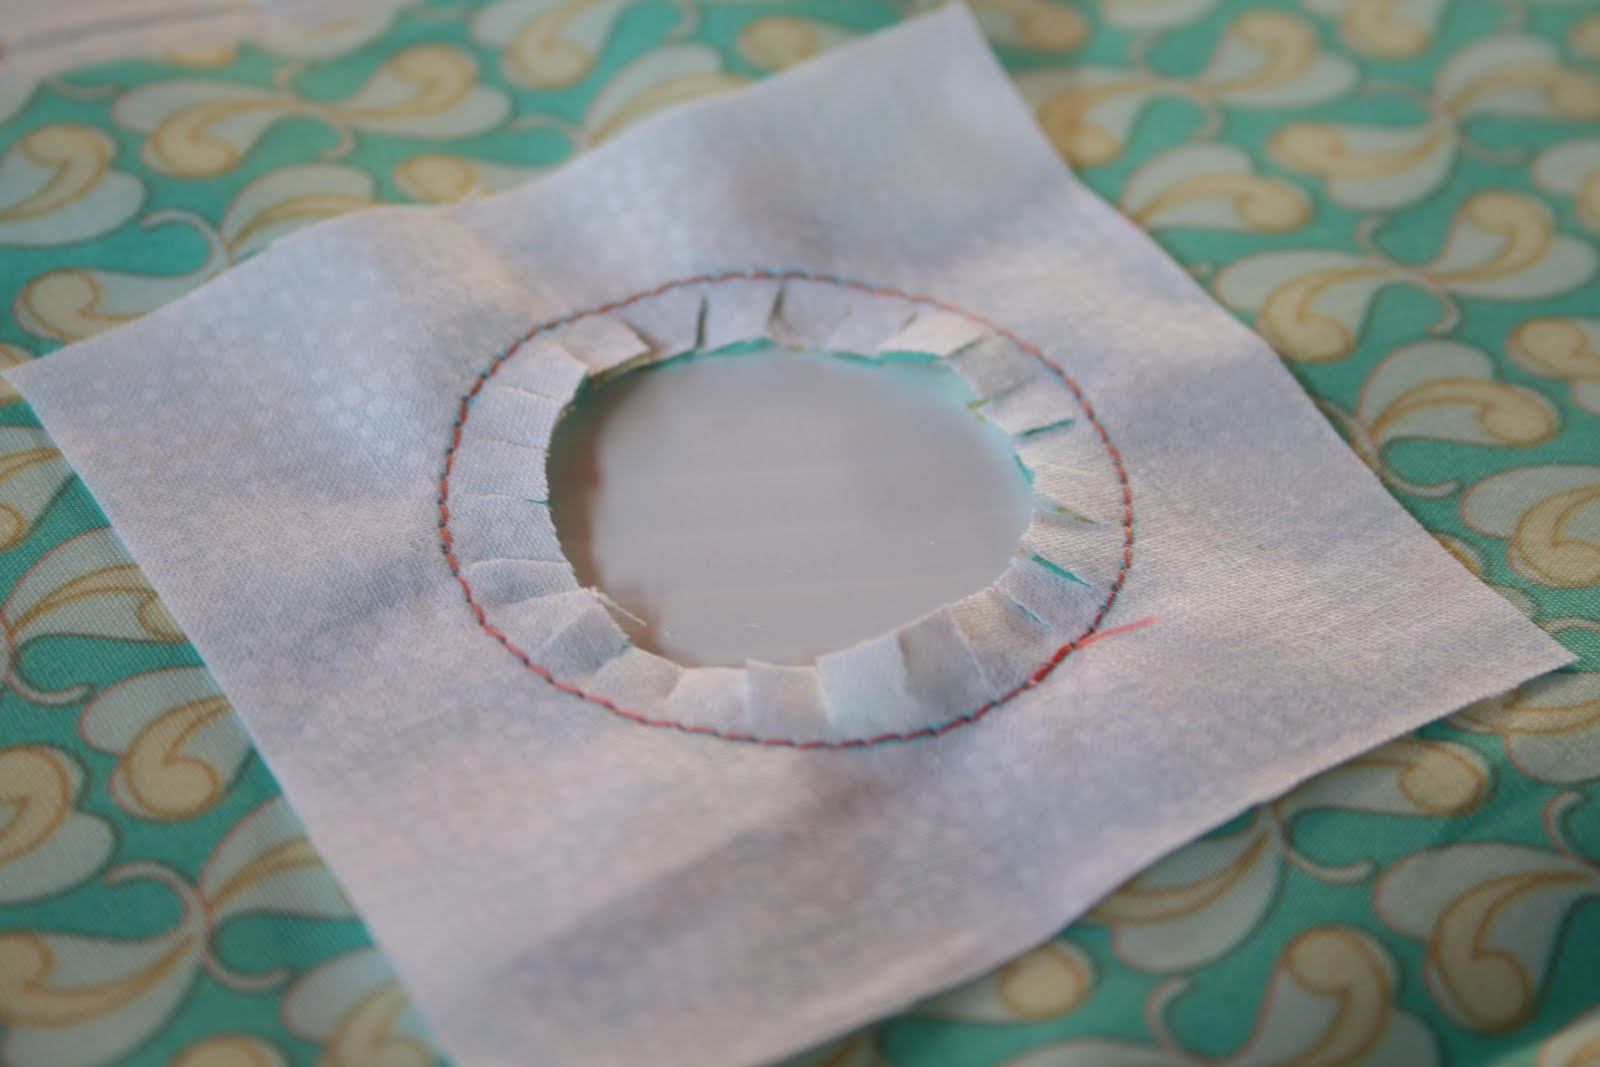 Cut the centre out of the circle leaving about 1/4 inch seam allowance inside your sewing line. Clip the circle.
 Now tuck the lining piece in through the circle and smooth it out behind.
 Hey presto ! Give it a press with the iron.
 This is what we have at the back
 and in between the layers.... You can further trim that lining piece on the back if you like.
Put your third piece of fabric behind the window you have created (This would be good for fussy placement of little pictures)
Top stitch around the circle using a small stitch, holding your third piece of fabric into place.
So guys this is by no means a definitive way to do this, its just the way that works for me and gives the effect I want.
So guys this is by no means a definitive way to do this, its just the way that works for me and gives the effect I want.
(I cannot tell you how much that orange thread is grating on me and my anal ways)