Saturday, January 23, 2016

Classes 2016


I almost feel like I need to apologise for this rather lackluster list of classes. I get a lot of emails asking why I am not teaching in far North Queensland or Perth or at the shop just up the road from someone's house. The truth is I just don't have enough time to teach everywhere that wants me to teach. At this point I have four definite classes planned for the year.


This will be a do-what-you-wanna-do kind of class. You can work on any of my patterns and I will be there to guide you. I have a lot of patterns that will never be a one day class because they are just too big so if you have ever thought you might like to tackle Frankie & Dee or Little Red, this is your chance. Of course you can work on any pattern and you can book online.


March 29th - Millrose Cottage - Ballan

This is a kids class  (although grown ups are most welcome). We will be making dinosaurs !!- You can book online for this class as well


June 28th - Millrose Cottage Ballan

Another kids class at Millrose. It is a long way off so I am not sure what we are doing but it will be fun I promise. You can already book into this one as well !!!

September 10th - Cutting Cloth - Fitzroy

I had a ball last year teaching at Kellie's shop. We have yet to work out the project but this is the only Melbourne class I have planned for 2016 .
You will need to contact the shop for this class.  I hope to catch up with some of my elephant making friends again !! 


I am also working on two very special classes and a bit of a demonstrating gig for 2016 and I will keep you in the loop as details get ironed out.

It doesn't look like from your side of the screen does it ? Trust me, these dates have to get massaged in between the day job and the fabric designing deadlines and the crazy pre-market sewing and the market trips and all the other things like significant birthdays, and holidays and family events and even a little bit of time assigned to stop my head exploding.
Exploding heads aside I hope some of us get to catch up this year.


Wednesday, January 20, 2016

quickly now

I am popping in to share with you that the wonderful Rita of Red Pepper Quilts is sharing a quilt she made for me on her blog today.
I know that you guys all know Rita. She has one of the most distinct styles and I very happily send her fabric and say "Do whatever you want Rita", knowing that whatever she does will be awesome.
I am enormously privileged to work with her and eternally grateful not only for her wonderful quiltmaking but also for her real-life , down-to-earth humour and way of looking at things.

 Rita is giving away a fat quarter bundle of The Cat's Pyjamas - all you have to do is visit Rita's blog and leave a comment. Entries are open to everyone. I will post anywhere in the universe !

If you don't already follow Rita on every form of social media - you better hop to it ! 
(You can thank me later)

Monday, January 18, 2016

elephants

Yes, I have a thing for elephants. They fascinate me. I even have an elephant board on Pinterest, with pictures... of elephants. I could look at them all day.
This pattern has been a slooooow burn. It often happens that I fall out of love with a pattern and abandon it to the forest of zip-lock bags.

I mean slow - Instagram tells me this and the next photo are 55 weeks old.....


The five part under gusset may have had something to do with abandoning the project. I realise this will be my fifth elephant pattern and I would like to be able to say that this will be the final elephant installment but there is at least one more brewing way.


I took a version to Spring Market last May (and cannot find it anywhere).

Here is where we are now, one pattern with three different trunks.

Version A 

Version B


Version C

Don't get excited though folks, we're still a long way from finished I just thought you might like to weigh in with your choice for the cover elephant . Does A,B or C speak to you? I may end up doing a collage - yikes, how terribly posh. Yes I have already instagrammed / facebooked about this so don't feel you need to answer me again.
 Although if you feel like saying "Enough with the bloody elephants Jod !" - I would totally understand.

Friday, January 15, 2016

Beach


I went to the beach and it was cool and fresh and underpopulated.

Which is good really, 'cause some days you just don't want to explain the felt penguins in your pocket.


Saturday, January 2, 2016

Lecien Jelly Clip purse tutorial


I have made loads of these awesome purses lately, I have changed and adapted a few things as I went along and promised a quick tutorial for Jan and Trash (and I am catching up with them both later today) so here it is.
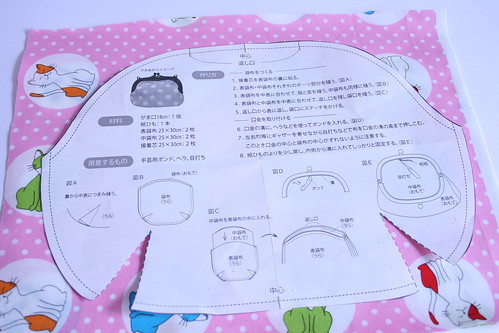
Using the pattern that comes with the purse, cut out your outer fabrics, inner fabrics, and I also cut out a layer of Vilene 620 ( a light iron on fleece). NOTE: those notches are to mark the darts, they are not cutting lines.
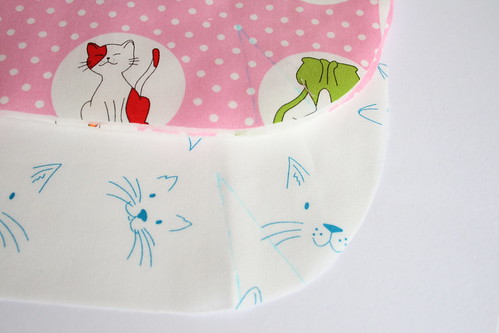
See ! Use the notches to mark the darts on both your outer and inner fabrics. (I have already ironed the Vilene to the wrong side of the outer fabric)
Look at those sexy darts !!!

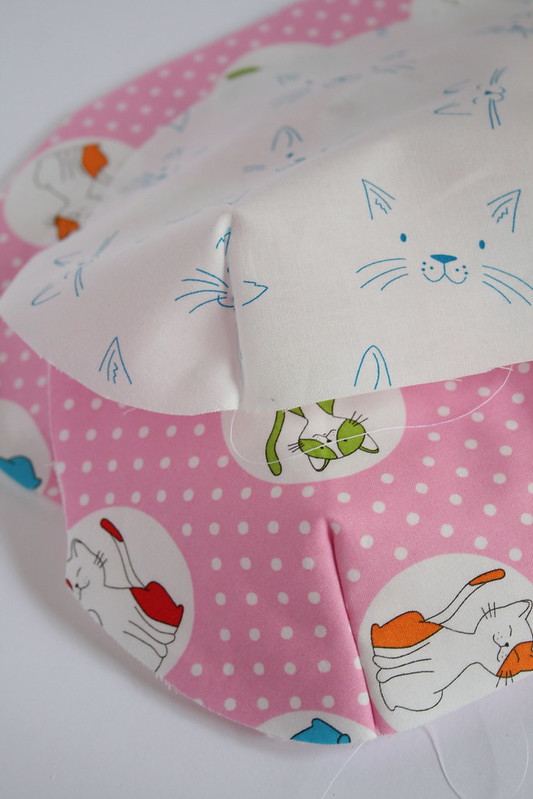
This is the bag outer wrong sides out ( vilene side showing). Pin and sew around the bottom and sides of the purse. Do the same with the lining.
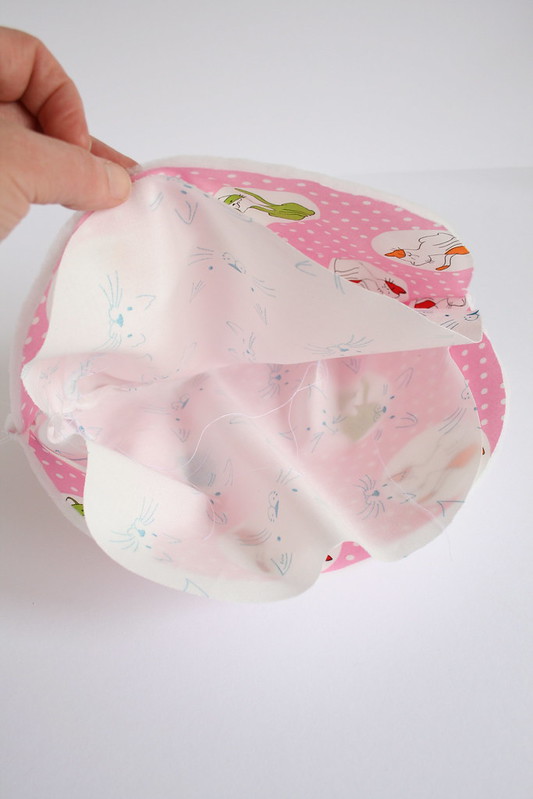
Once sewn, tuck the lining (wrong side out) into the purse (right side out). EASY ! Double check that the right sides are together... No really, just check.
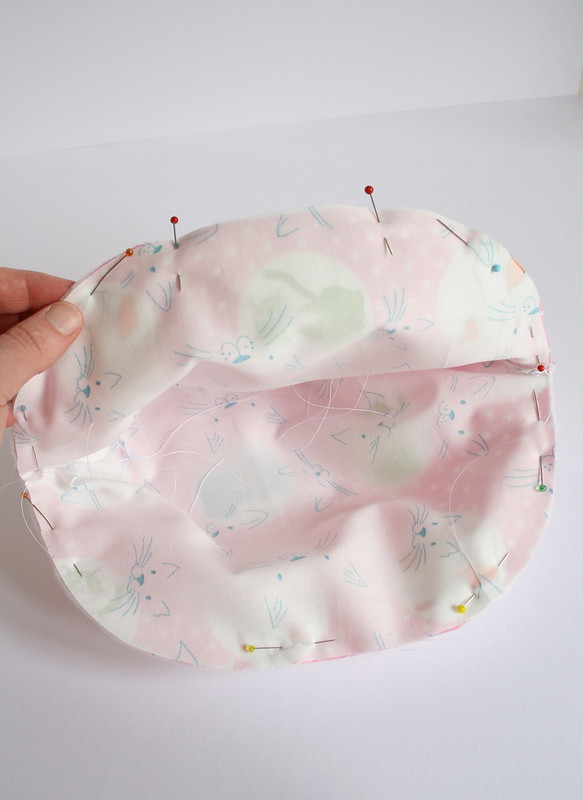
Pin all around the top of the purse, leaving a turning gap ( as indicated on the pattern). In a genius move, the turning gap is at the top so it doesn't even need to be sewn closed later as it is hidden in the frame. Sew , and then be sure to clip the seams at the side seams.
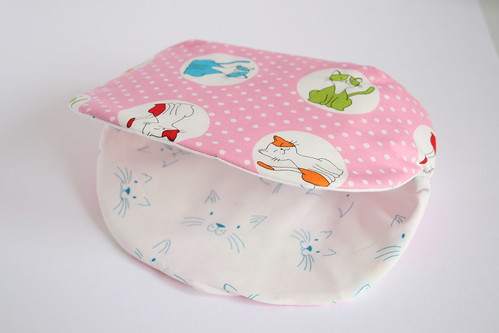
Turn the whole thing out through the turning gap and tuck the lining into the purse.Yay ! Looking good so far !
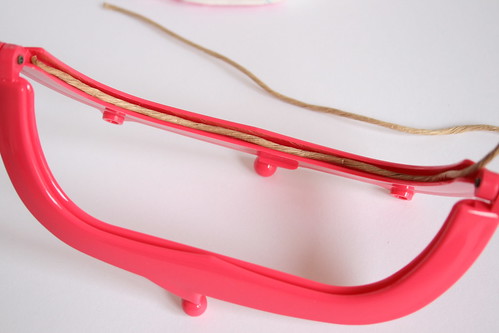
Take the paper twine that comes in the kit and chop it in half. Things get a little inexact here but bear with me. Poke the paper twine into the frame to measure and then cut it so it is 1/4 inch shorter than the frame slot at each end.

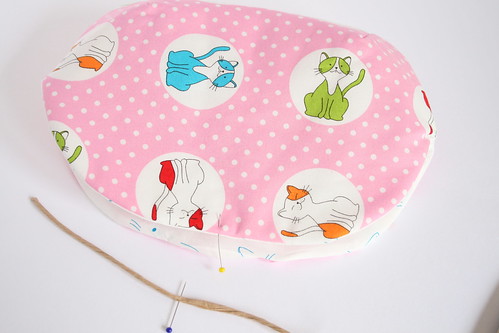
Working on only side of the purse at a time is easiest. Find the middle of the purse and the middle of the twine and mark it. The twine is much shorter than the top of the purse, because the purse is slightly gathered.
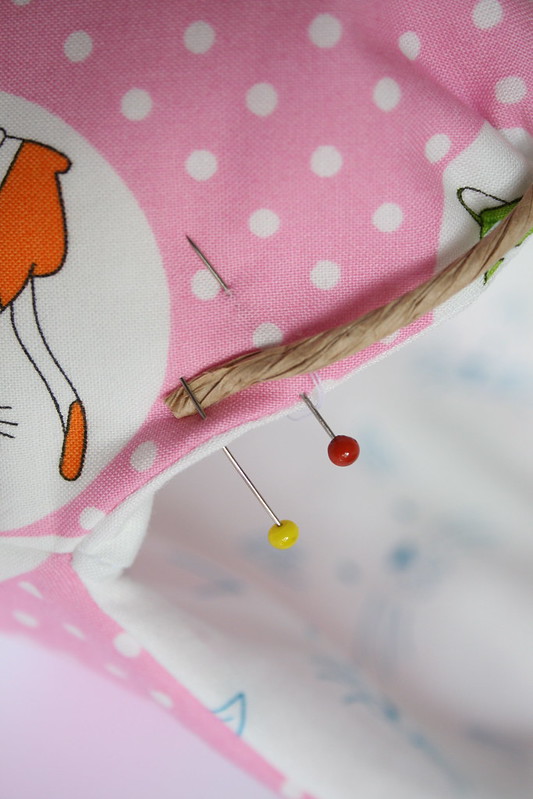
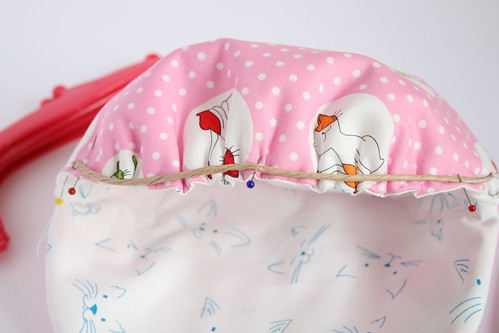
Now we need two marks, one about 1 inch From the side seam of the purse (yellow pin) and another one about 3/4 inch in from that ( red pin). Do the same at the other end. The yellow pin shows where the end of the twine will be. The red pin shows where we will begin gathering. I use a needle and thread and run a gather stitch along the edge of the purse, gathering it until the purse fits the twine.
Try not to get too strssed about the gathering, mine are all pretty rough but once it is in the frame, you really don't notice.

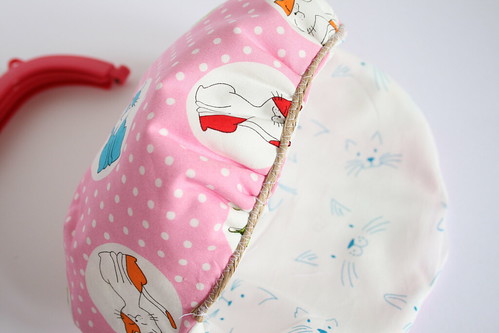
Using a small zig zag stitch on my machine I sew the paper twine to the purse, trust me, this is the big secret. Ok, now go and repeat all that pinning and gathering and twine sewing for the other side of your purse. 

I
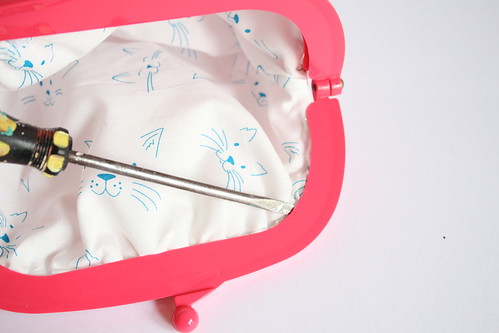
Spread a small amount of glue inside the frame. I used a kitchen skewer to make sure I had it pretty well covered. Then simply poke the purse into the frame. I used a flat headed screwdriver to really wedge it in. Leave it alone until it is perfectly dry before you attempt to glue the other sid.
I have tried two different glues so you can choose whichever you prefer.
1. Superglue : it is super quick and as strong as strong but if you spill it on the frame it is never coming off. I don't know about you but always end up glueing my fingers together or glueing things to things that shouldn't be glued with this stuff. I made a purse for market and used superglu and I used it for days, full of heavy stuff, then came home and tossed it in the washing machine and it is still holding up just fine.
2: PVA - This one is more likely to come blobbing out of the frame as you push the purse in, but it dries clear and can be removed. Again, the purses I have made were super strong with this glue as well.
In the interests of this tutorial I did try and rip the purses from their frames. No way was the superglued one moving. I was able to remove the PVA glued one, but it took a lot of effort. In conclusion either type of glue will hold your purse just fine unless you are in a bar fight.